Crafting Raw Authenticity: Producing SEPPUKU’s Debut EP

Seppuku EP Production Process

The production process for Seppuku EP was a journey that involved multiple stages—preproduction, recording, mixing, and mastering—all of which were driven by a vision to capture the raw energy of the band that was characteristic of the ethos of the 90s/2000s-era of alternative metal, sludge, and grunge. For this reason I chose to base my approach on some of the production techniques of the legendary audio engineer Steve Albini, who has been a major influence in my recording style. His techniques made a lot of sense as he too focused on capturing the raw energy of the band and for that reason only worked with bands that were well rehearsed and had a tight sound. His role was to act as a window to their sound in some way resembled this band’s goal which was to produce an EP that felt as live, and organic as possible while achieving a balanced cohesive sonic representation of the band’s sound.

Preproduction: Establishing the Sound

After completing my course at SAE Institute, I was eager to continue developing my skills in a real-world setting, particularly in studio record production. It wasn’t long before I crossed paths with Seppuku, a post-grunge/alternative metal/sludge band, through a mutual friend and classmate, Chris. The band was looking to record their debut EP, which I saw as an opportunity gain experience in capture a abnd’s raw sound through my own recording approach made by carefully researching techniques that could fit their style of music onto a record in a unique way .

By then I had done my share of production experiments with London based Indie rock/funk rock band Cherimoya. That helped in honing some of my recording and editing skills for music production work, which in my experience was much more challenging than producing Seppuku’s album. This was due to its raw nature and authentic sound. That meant fewer edits and just comping a few takes where necessary. When it came to producing Cherimoya’s record, they wanted their record to sound polished which meant:

1.  Editing all recordings, removing any additional noise from recordings (like hiss, rumble, etc) due to their clean sound

2. Quantizing each instrument to the played tempo which had to be created on Pro tools by mapping each beat to create a new unique grid based on the tempo of the chosen recordings that were to be comped.

3. Stitching all comps together  that requires precisely applying fades to all edits to maintain consistency in transients across each instrument throughout the song.


These tasks alone are cumbersome and meticulous in comparison to what Seppuku had requested for their EP, which was a record that sounded live in the studio without too many production gimmicks and that sounded true to what they sounded like in the room. Although we did some production experiments in the recording phase to give it some extra oomph while not wasting time on things other than achieving a nicely balanced mix, which I will get to in the later sections. 

A band like Seppuku that particularly required a more authentic, live-feel recording, focusing on capturing the band’s unique chemistry and, combined elements of punk, with grunge,  heavy metal and shoegaze, presented the perfect opportunity for me to apply the production style of Steve Albini’s recordings who has produced some of my favourite live sounding records in Punk and Grunge – like Pixies‘ ‘Surfer Rosa’ and Nirvana’s ‘In Utero’. Both are very raw sounding records that have the sound of Albini’s wonderful studio rooms. Also, as mentioned earlier Albini used to focus on the band being tight and as he only recorded to tape the band always had to be tight as there are only a limited number of reels available in each studio and if there aren’t too many or if there is just one the take really need to be perfect to use. 

The drawback of working with tape is that it also doesn’t allow any micro edits like quanitization and transient shaping through fades and only allows macro edits like stitching two section on different takes. Therefore, I also chose to follow a similar approach.

After meeting the band and hearing their demos and live performances, we agreed to record five songs for their debut EP. The preproduction phase was a crucial step to get a sense of their sound. The band provided a few reference albums that influenced their sound:

  • Calm – 12” 

  • Dystopia – Dystopia

  • Dystopia – The Aftermath

From these references, I noticed that the drums were the backbone of most of their songs, driving the compositions forward. The guitars needed to be crunchy and heavy, with a lot of body, a cross between Dystopia’s and Calm’s style, but with fewer vocal lines, closer to Calm’s more atmospheric vocal approach. Despite the knowing about contemporary metal productoins, Seppuku’s having rejected the overly-tight, heavily-quantized sound typical in most modern metal productions wanted to retain the imperfections that come with a live performance—something that would provide the EP with a unique character, integrity and authenticity.

Every session had a complicated setup and required advance planning. My role as the lead engineer and producer involved activities like scheduling sessions, planning microphone and mixing console layouts for each session which were incorporated into a session plan for each recording session day. We planned to spend one 6 to 9 hours on a single day in the studio to start with covering the skeleton of each track.

Every session took place in a different studio room at my Univeristy (Uni) studios – SAE Bankstock studios, it meant working with different mixing desks, microhpones and outboard gear, as each room had a specific set of equipment inside it. We generally had different session plans to use a aprticular piece of equipment based on which room we were planning to use. For recording the songs used some of the best vintage mixing consoles like the Neve C75, SSL G+, AWS 900 and Neve VR. Signals from the console preamps were fed to Pro tools and occasionally through an exotic analogue reverb like the Lexicon 480 L or Bricasti M7. 

Bankstock studios were usually packed on the days we were planning to hold our sessions. Being a part of our Uni Studios, it was the place where students go to work on their Uni Projects due to which it was mostly booked out by Uni students. That sometimes screws all our session plans as students booked out a lot of microphones that we had straegically chosen for our recording. Asa result, sometimes had to go with the next best available microphone which sometimes maybe not be of the same caliber but sometimes could also lead to some exiciting and unexpected results. Knowing the booking situation, I always included backup microphones in my plan for some scenarios depending on how booked the studios look. I don’t get disheartened that my recording won’t be as good anymore if I don’t have the right microphone. In fact, If there is anything I have learnt from working live sound for music gigs, there is always a time where you need to work within limitations and trust me that test happens more often than you would think. Therfore, I am trained to deal with such times with optimism and hope. One of the reasons why I do this is because each type of audio production work whether related to music production (live/studio) or post-production, poses it own unique challenges which become fun to solve especially if you really want to see the end product come to life. That perspective keeps the work fresh, teaches you a thing or two (which I feel is the experience we gain as recording and mixing engineers) and provides confidence in trying something new and audacious. Such work keeps me on my toes as each project requires a different kind of attention and care.

Recording: Capturing the Performance

The recording sessions were scheduled over the course of six to seven days, with several takes and re-recordings of certain instruments to ensure we achieved the best possible results. The goal was to achieve a natural-sounding recording that mirrored the energy of their live shows.

I wanted to record the band in a way that felt true to their live sound. To do this, I needed to take into account several key factors during the recording phase:

  1. Microphone Selection: The choice of microphones was critical to achieve the best sonic representation of the band. I used a combination of close mics and room mics for each instrument to ensure clarity and definition, while also capturing the “space” in which the performance occurred similar to any Albini record. The use of multiple microphones allowed me to shape the tone of most instruments – guitars, bass, and drums.

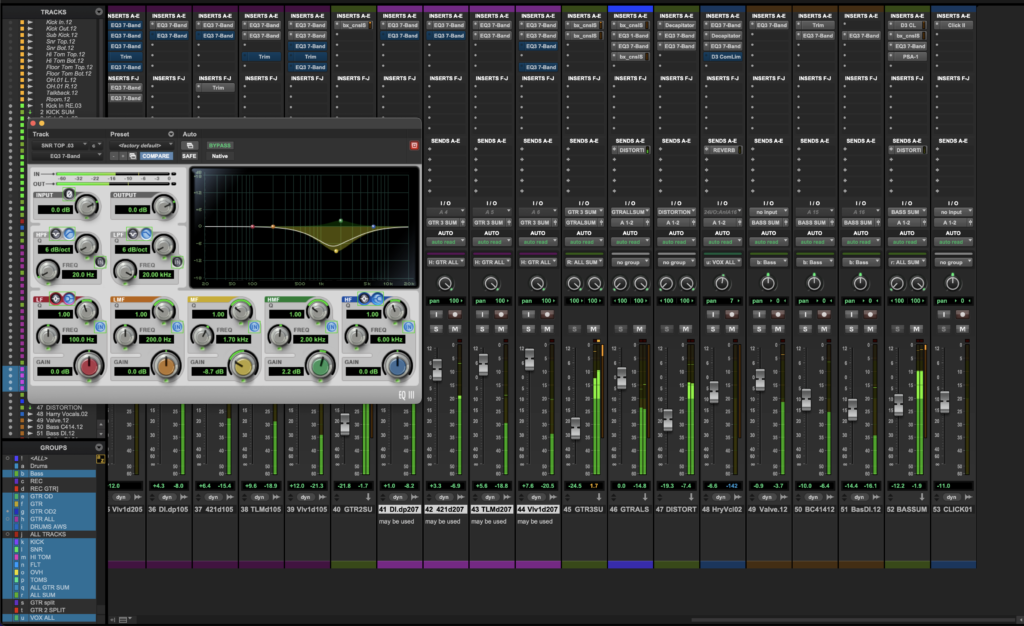
  2. Preamp and Gain Staging: Proper gain staging ensured that we captured a naturally dynamic sound. Each instrument’s volume levels were carefully monitored during tracking, ensuring that no part of the performance was under- or over-represented. If the preamp levels are good, each instrument would be intelligible, which allows to construct a rough levelled mix faster in the studio (for monitoring the recording live in the control room). That provides us more time to do more takes while the band is feeling it. When the band is performing we are understanding what microphone signal sounds the best and deicide on altering any mic positions swiftly if required to keep the session moving smooth but fast. That requires both knowledge of microphones and how a particular instrument is supposed to sound through a particular mic (which for me came from years of listening to different records, engineering sound for hunderds of different bands in live settings and doing a good enough share of experiments with different types of bands and musical acts within the studio through both minimal and maximal microphone setups. Only then can you truly tell the difference between what an unintelligble, or average or an extremely intelligible mic signal sounds like). We really spent time finding the right microphones to capture them as the mix was only going to be as good as the recording. If we wanted a rich sounding mix close to the references that we had to really get the recording to sound good. 
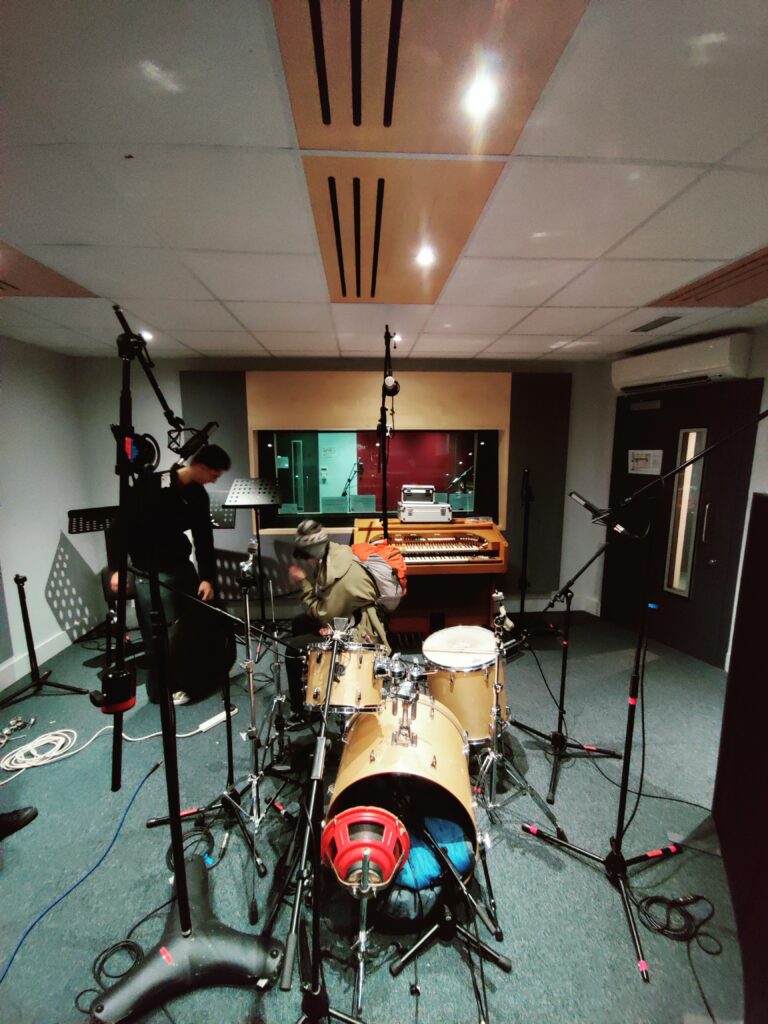
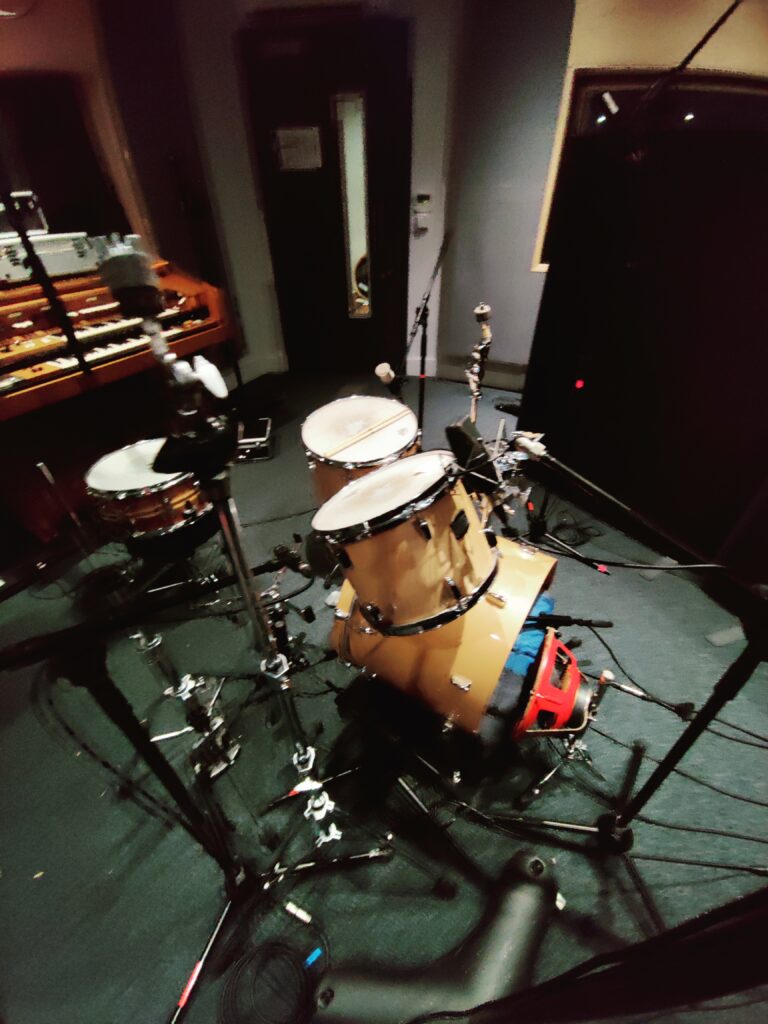
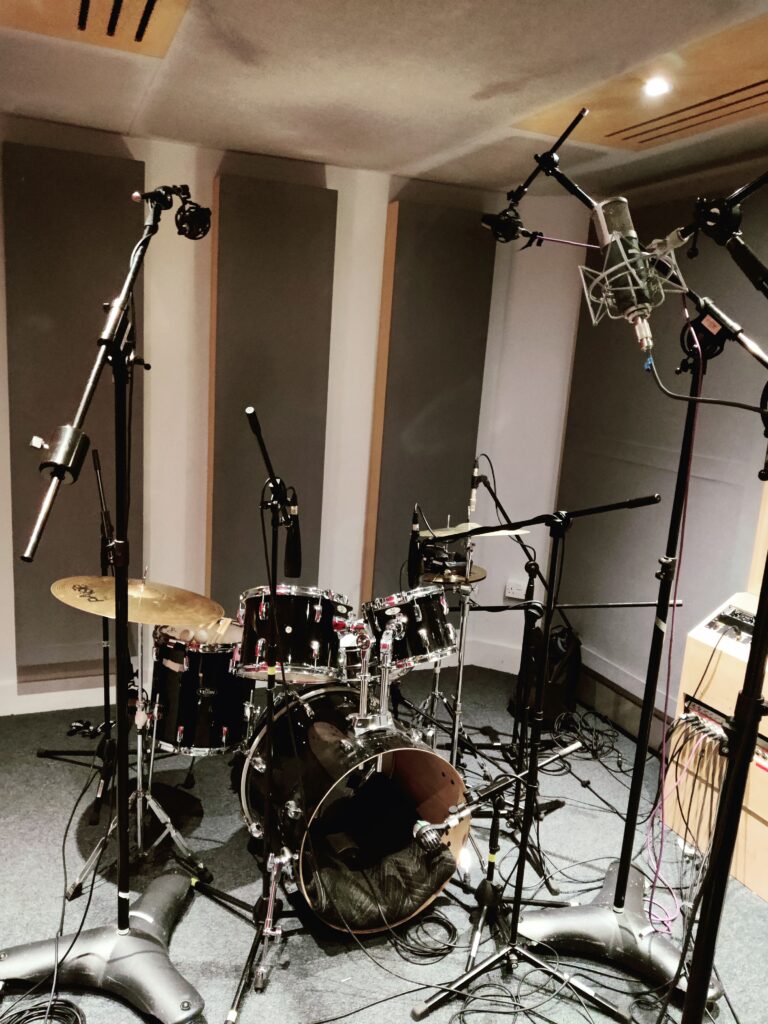
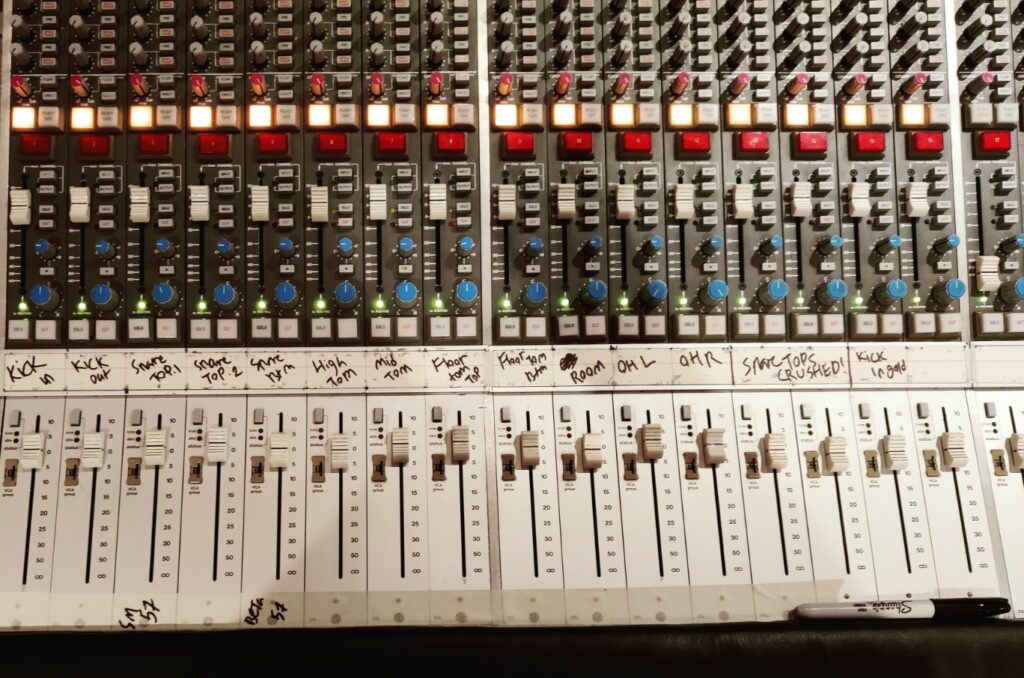
    DRUM TRACKING:
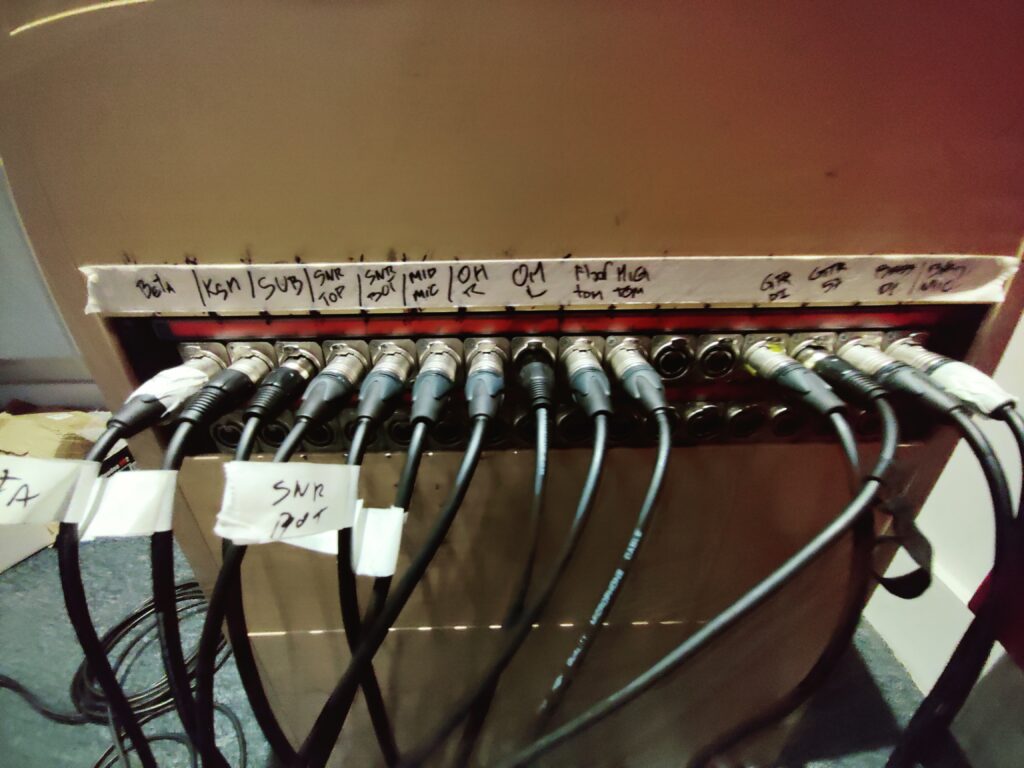
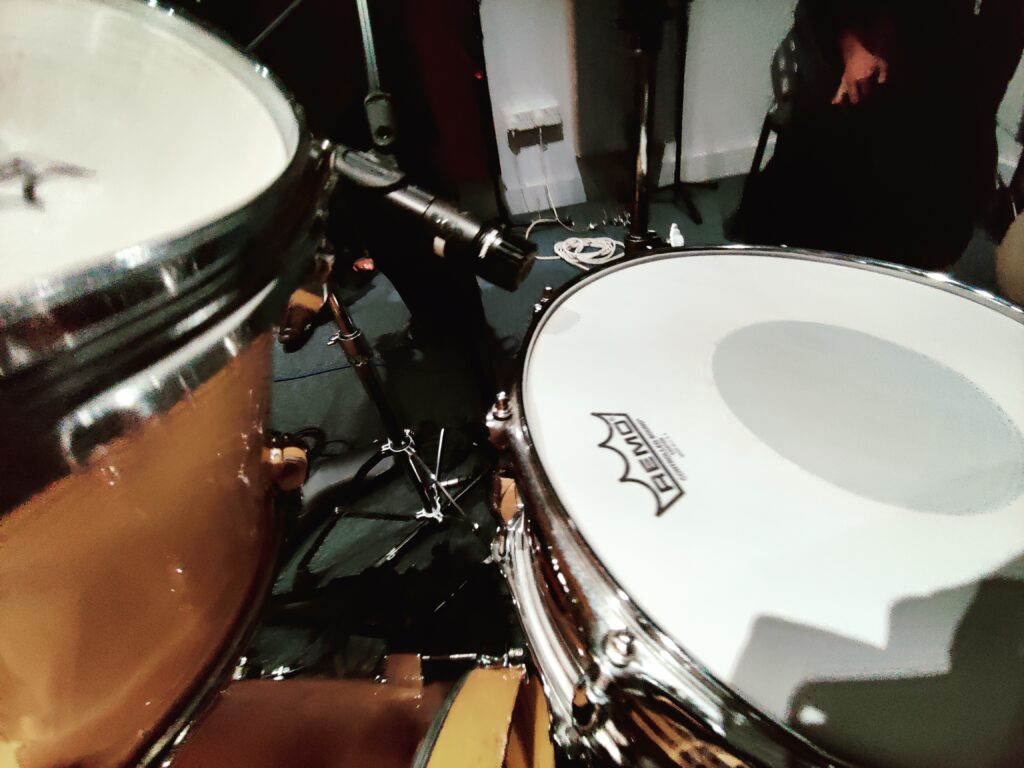
    We chose to add a good amount of detail on the drums and therefore went for a hefty setup that had about 10 to 14 microphones.
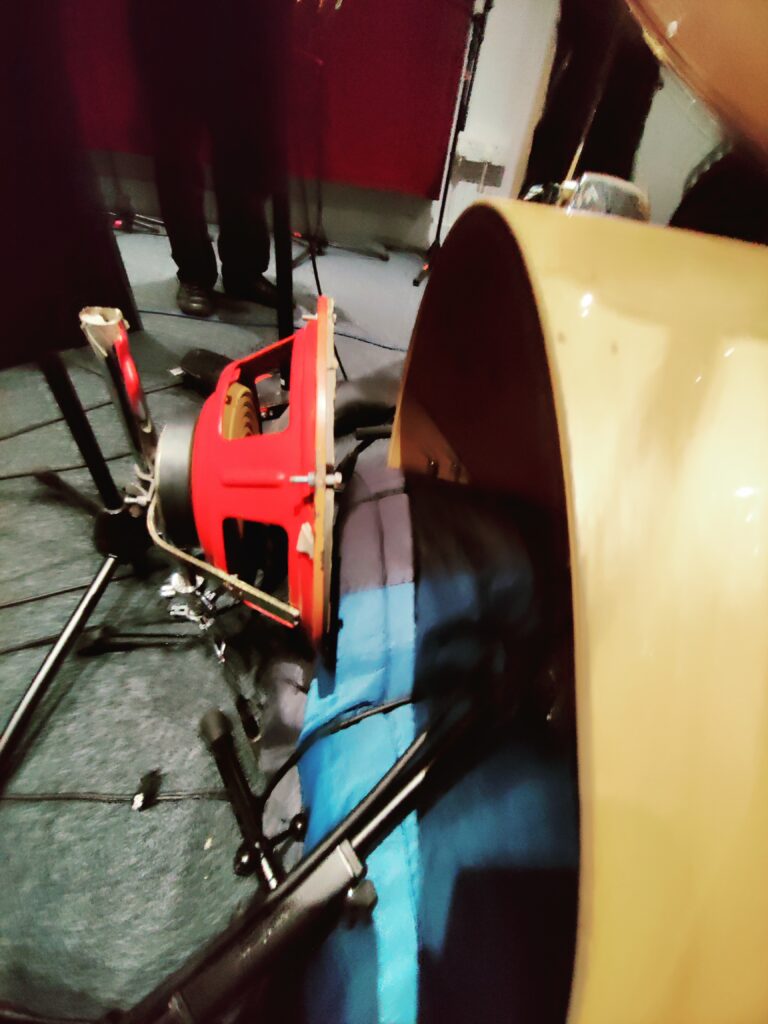
    We used bottom microphones for each drum that ended up increasing the overall count of microphones. But we didn’t question that as we wanted pure fidelity and wanted to capture as much detail especially the low frequencies which meant using a secondary (sometimes even a tertiary mic) other than the spot mic for capturing the entire body of the sound or just the low end (as low frequencies have larger wavelengths). For that reason we also used a subkick apart from the regular kick in and kick out mics to ensure capturing the sub frequencies from the kick drum –  to add weight to the kick drum.

    Similarly for the snare and toms we used bottom mics for low end and body. Close mics/Spot mics provided the crispy high frequencies which were to be added to the secondary and tertiary mics. 

    We went for equidistant cymbal mics from the snare placed in a fashion that minimized spill from the snare and at a decent height to avoid any harshness from the cymbals.

    We sometimes also used a room mic at a height in front of the kit (pointing at the snare) when doing the drum recording inside a separate booth. This was to add some natural reverberation and sense of space to the drum sound. Being the backbone it had to take a considerable amount of space in the mix and acts as the foundation layer or bedrock for this production. In those cases, when the drums were being recorded and performed together in the same room, I chose to use a room in a more central postion and ensured using an omnidirectional capsule for the same to capture the enitre room ambience. These were all experiments that are now a part of my knowledge on the subject.  


    GUITAR AND BASS TRACKING:

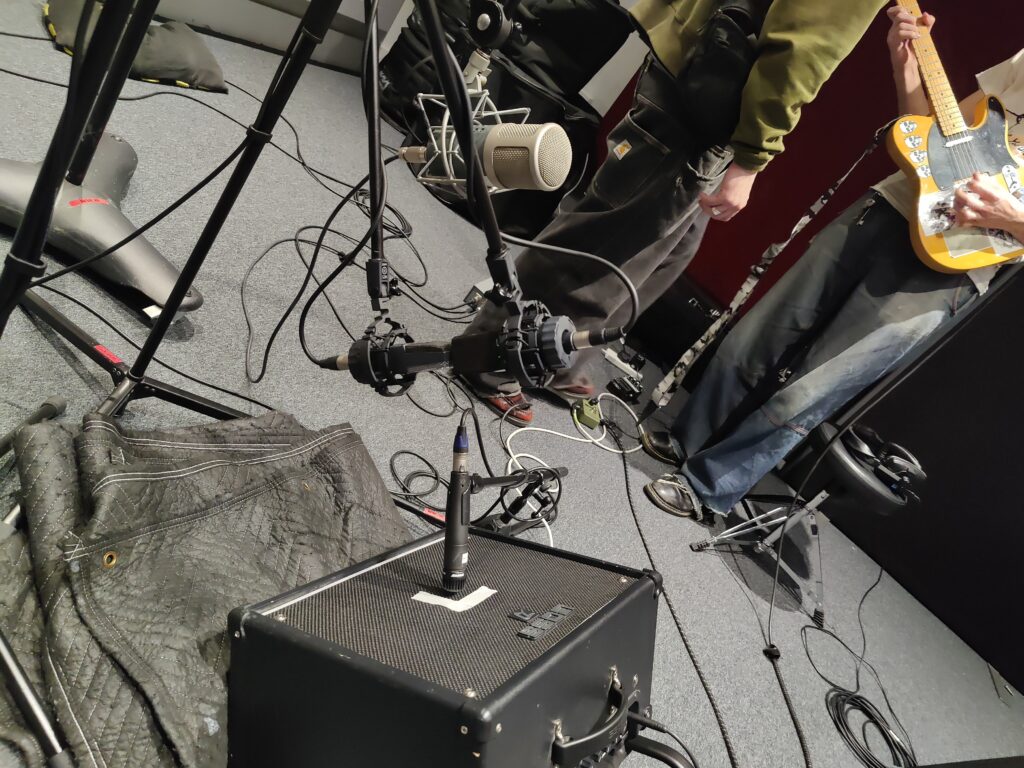
    We followed the same principle of using mulitp-mic setup to capture each detail. The guitar and bass were crucial as their transients could really make or break a record. A lot care had to be taken epsecially while recording the guitar as Seppuku’s guitar sound was full of gain and overdrive from an analogue heavy distorted pedal.

    Also, as the gain setting for each track was different the mic positions also weren’t exactly the same. Also, since we were still trying to gather experience in the art of recording music, we also used different mic setups. For example, most of the songs used a similar setup that can be seen below but for Enough to Bear the Weight  we used a Mid-Side recording technique. The band really enjoyed the spread and uniqueness that came out of that technique for the guitar recording of that song. Another reason why we chose that technique is because based on the band’s request to keep things simple on the guitar recording for that song,  we didn’t plan to do any overdub takes on the guitar track for extra width in the mix. So, instead for the extra width we chose to do a Mid-Side due to its particularly large yet wide stereo image.

    We used a combination of large diaphragm condensers for the body and dynamics for the high frequencies. Unlike, Albini who has had his own microphones built by large names in the microphone industry based on his individual taste and purpose, I tried to do everything within a small microphone budget but still packed a good set to get some decent results.


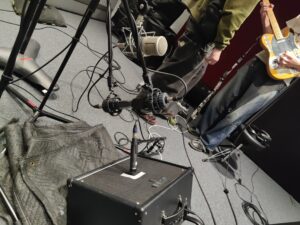
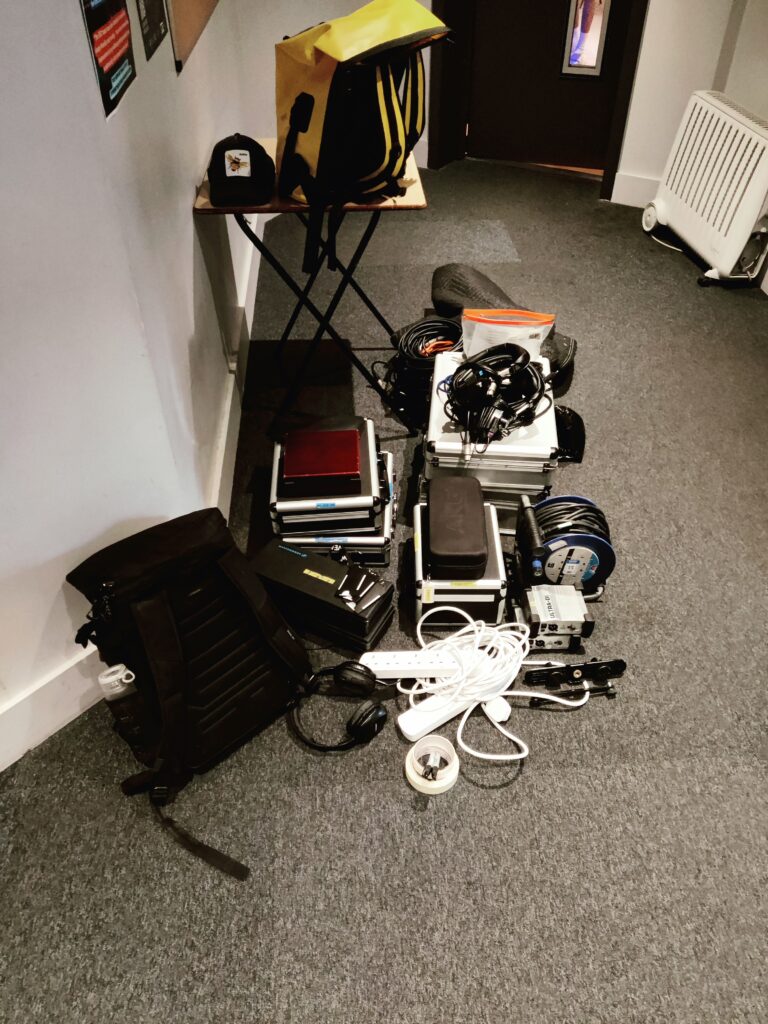
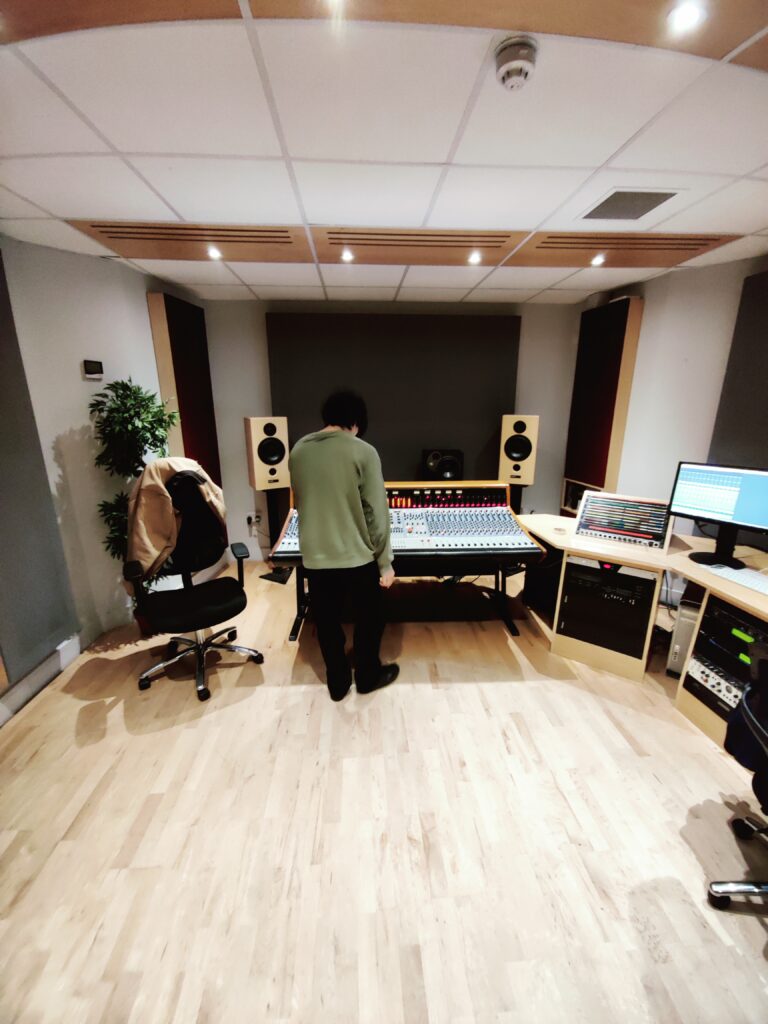
    (See above full images along with some more images from our microphone setups used in different recordings after this section)

  3. Encouraging Expressive Performances: In line with Albini’s philosophy, it was essential to capture the most expressive performances, even if that meant comping (compiling multiple takes) to create the best version of a song. This involved paying attention to nuances in the musicians’ performances—focusing on chemistry and spontaneity. Some songs, like Flower Man and Interlude, were recorded with all the band members in the same room, feeding off each other’s energy to deliver an organic and cohesive performance.

  4. Click Tracks & Positioning: For tighter arrangements, particularly with faster tempos, I used a click track to ensure timing accuracy. I also paid attention to room acoustics and the band’s physical positioning to maximize the sound of the room and minimize spillage.

Editing and Comping: Honoring the Raw Performance

After the initial tracking sessions, I spent a considerable amount of time editing the recordings. This phase involved selecting the best takes and comping them into composite tracks, a technique that is common in digital recording but less so in tape-based sessions. Despite working in a DAW, I approached comping with the mindset that Albini would likely employ in a tape-based studio: minimal edits, focusing on preserving the performance’s natural dynamics and energy.

A few specific techniques and decisions during editing included:

  • Aligning Tracks: The dynamic range across the entire EP needed to remain consistent. I made sure that each instrument, especially the drums, had consistent timing and energy across all takes.

  • Comping Takes: Since Seppuku preferred live, unedited performances, I created comped versions of the tracks that would allow me to select the most well-executed parts of each take. This process involved listening critically and balancing the most musically cohesive sections while avoiding over-editing.

  • Mic Alignment: Ensuring that all microphones were aligned correctly allowed for a smoother editing process and a more natural sound when it came to mixing. This step was particularly important with drums, as the dynamic range had to be preserved across the different mics.

Mixing: Bringing the Sound to Life

The mixing process focused on ensuring that the energy of the live recording was maintained while giving each instrument its place in the mix. Inspired by Albini’s minimalistic style, the goal is to allow each instrument to breathe and sit naturally in the space without excessive compression as that may make things sound mechanical. From the information I have gathered on Albini, he defintely never enjoyed compressing his drums for that reason which gives his drum mixes a natural sound. His room itself added so much character to the sound of his drums that they always came out special. Keeping such things under considerations, ther were some key mixing techniques we decided to start with:

  1. Guitar Tone: One of the standout features of Seppuku’s sound was the dynamic range of their guitar tones. I noticed that the guitarist’s overdrive pedal heavily influenced the tonal characteristics of each track. For example, Enough to Bear the Weight had darker, heavily distorted guitars with subtle guitar harmonics, while Flower Man used less gain, with more strumming sections resulting in a warmer and louder sound. I mixed each track’s guitar tone uniquely but maintained consistency in how the guitars interacted with the rest of the mix.

  2. Spatialization and Depth: To maintain consistency in the spatial feel of the tracks, I carefully managed the reverb settings. For tracks that were recorded in the same room (like Flower Man), I ensured that the natural room sound was incorporated, allowing for a cohesive sonic space across the EP. For tracks recorded in different rooms, I blended the reverb sends accordingly to maintain a consistent spatial feel. 

  3. Balancing Elements: Achieving balance in the mix was critical. This involved adjusting EQ curves to ensure that each instrument—particularly the guitars, bass, and drums—sat in their rightful place without frequency masking and without much harshness which inately present in the guitar sound (as mentioned above in point 1). The drums, for example, were crucial to the overall sound, so I ensured that their dynamic range was preserved, and avoided compression on any drum apart from the snare and sometimes some subtle compression on the drum group.

  4. Distortion and Colour: Distortion was used creatively to add warmth and colour to the mix, particularly in the guitars. This particularly helped in adding clarity and presence to each sound, giving it that characteristic “analogue warmth” reminiscent of the band’s reference albums. Blending the distortion for each instrument based on feel helped each instrument to sit comfortably above or below each other in the mix.

  • Mastering: Finalizing the Sound

The mastering phase was the final step to ensure that the EP was sonically cohesive and translated well across different listening environments. Given the raw and dynamic nature of the recordings, and a carefully thought out mix, we were able to preserve the integrity of Seppuku’s sound while ensuring a good overall level and tonal balance that was optimized for release.

The mastering process involved:
1. Fine-tuning EQ to sharpen or brighten the mix and removing any extra lows and highs,
2. Adding some subtle compression for movement
3. A good amount of brick-wall limiting add loudness while ensuring no transients clipp
4. Revisiting some mixes to ensure the tracks were not being overly limited or clipped to avoid losing their edge.

By carefully adjusting these elements, I ensured that the EP maintained its energy and rawness, while sounding polished and professional.

Conclusion

The production of Seppuku EP was an exercise in capturing the essence of a band whose sound was deeply influenced by the live performance ethos of the 90s and early 2000s grunge/punk/metal scene.

By following in Albini’s footsteps we focused more on getting the raw recording sounding tight, and less on leaving anything to be fixed in the mix. Having a systematic and well thought out production approach helped paying a good amount of attention to what was required for each instrument to be captured in the most detail and intelligibility, based on considerations on whether it was recorded and played in the same room with other instruments or not. This thought process allowed us to manage spill and retain the cohesiveness through the careful selection of studio rooms, appropriate mics and optimal mic placements (based on the room size) and a sparse usage of spatial effects to add the sense of space to those recordings in which all instruments were not recorded in the same room. All such considerations truly helped bring to life and make a record that felt alive, natural, and true to the band’s real spirit. Only by going through this entire process were we able to reach the desired result that acted as a raw yet cohesive body of work that reflected the grit and energy of Seppuku’s live sound. I hope this blog was helpful to understand the sound of Seppuk and at the same time also serves as a rough guide for anyone who is learning how to record bands in a studio environment. 

Leave a Reply

Your email address will not be published. Required fields are marked *